Whiteout Survival
Follow this guide to set up your bot and emulator for Whiteout Survival. Select your service type below to get started.
Download and install the bot
Click the button below to download the Whiteout Survival bot. Once downloaded, run the installer and follow the on-screen steps to complete installation.
Download Whiteout Survival BotGenerate your trial key
Get a free trial key to test the bot before purchasing:
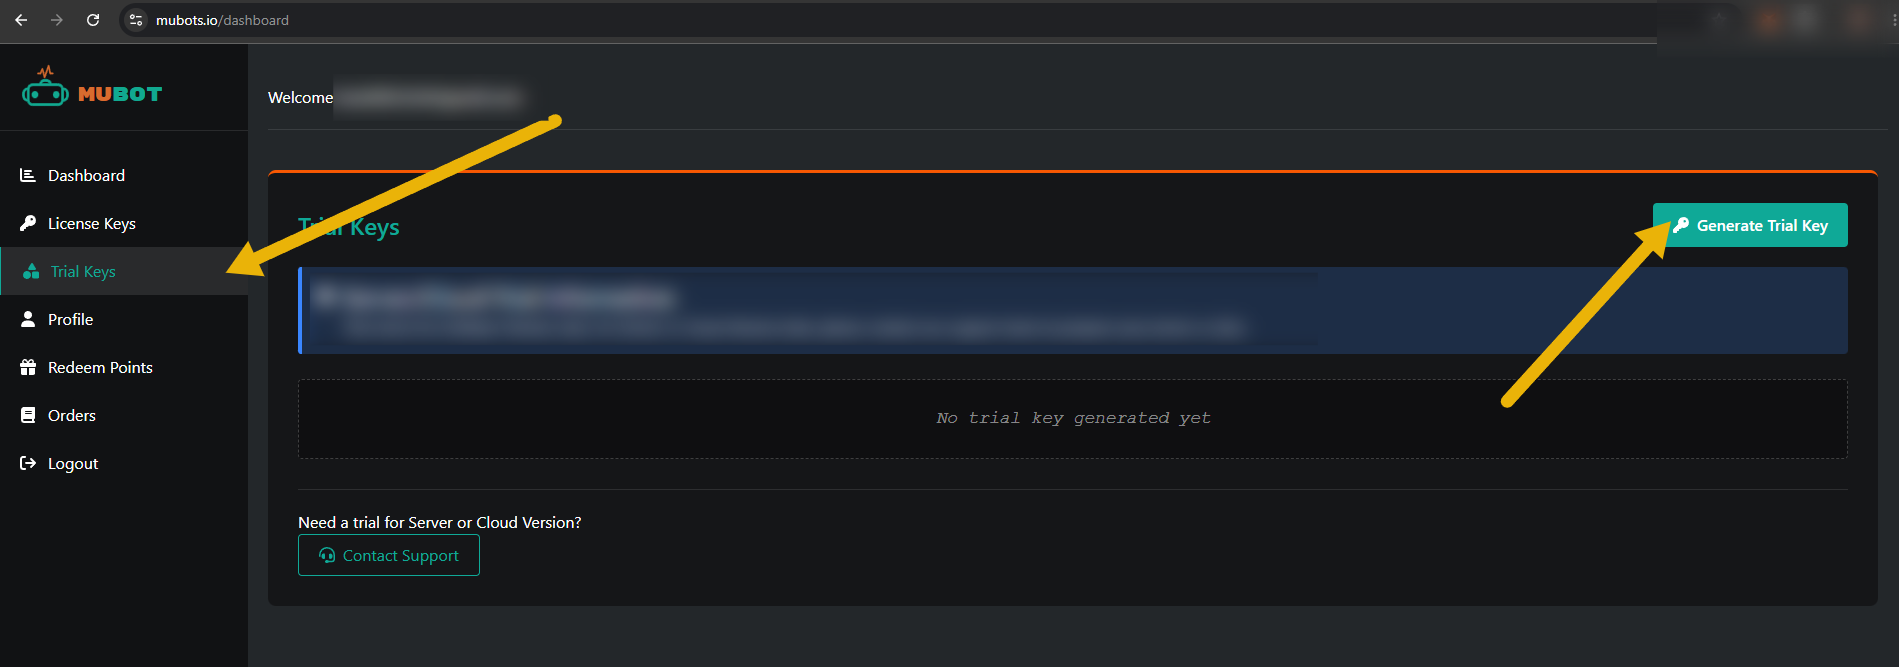
- — if you are not signed in, a login window will open so you can sign up or log in first.
- In the Dashboard, navigate to the Trial Key section.
- Click Generate Key, select your game from the dropdown, and confirm.
- Your trial key will appear — valid for 4 days, all features included.
Open the bot and enter your key
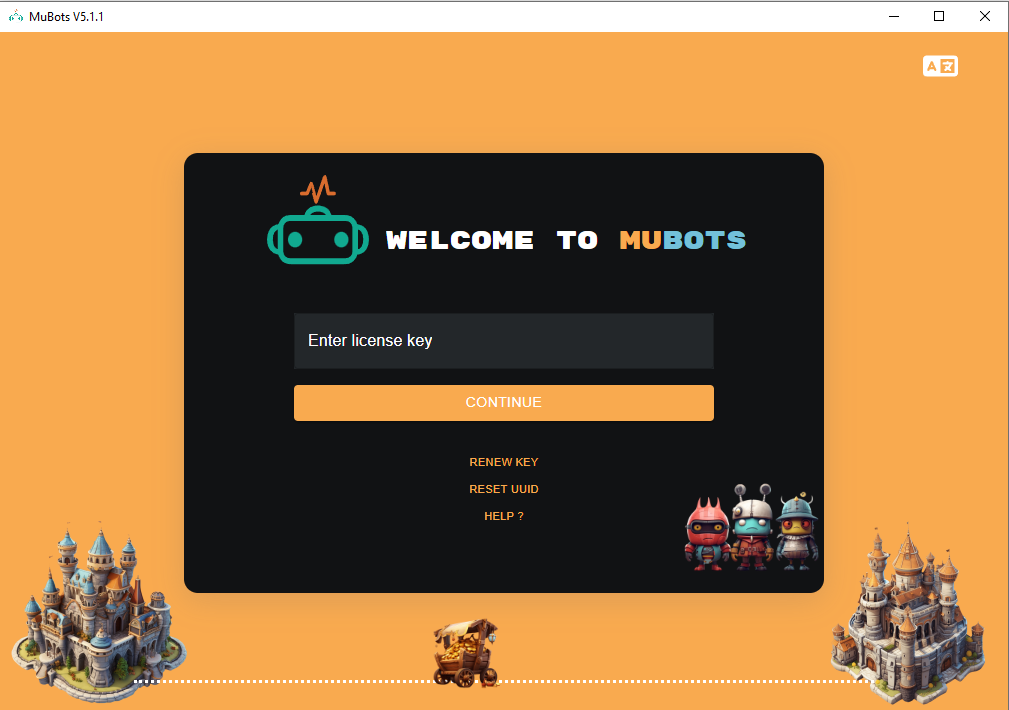
The bot runs automatically when Windows starts. You can also find it by searching MuBots in the Windows Start menu.
Once the bot is open, paste your trial or license key into the Enter license key field and click Continue.
Select your emulator
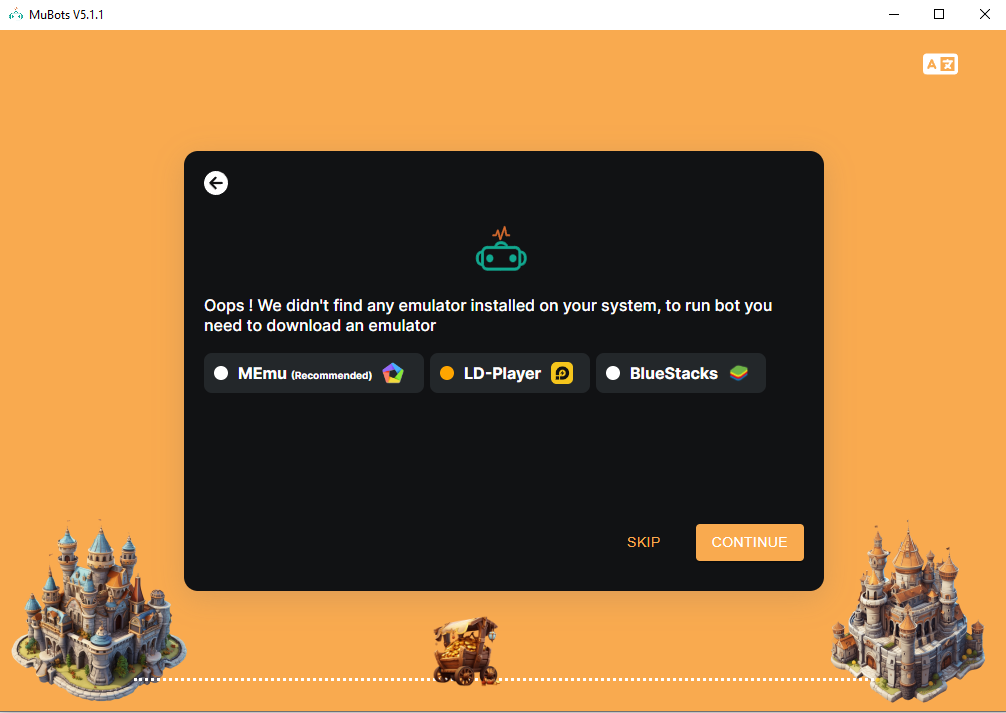
After the key is validated, the bot checks whether an emulator is already installed on your system. If none is found, it will prompt you to select one to download.
- If you already have an emulator installed, click its name — the bot will detect it and skip the download.
- If you do not have an emulator, select your preferred one and the bot will download it for you.
You can also click Skip and set up the emulator manually using the guide below.
Install the emulator
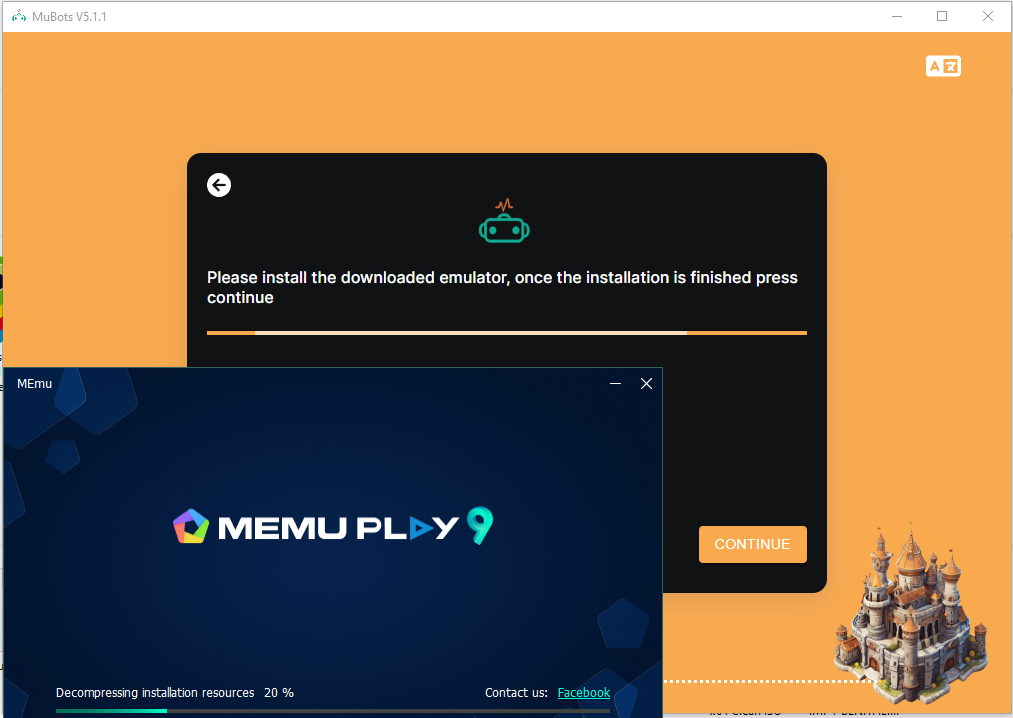
If the bot downloaded the emulator, the installer will launch automatically. Complete the emulator installation manually, then click Continue in the bot once installation is finished.
Select your preferred Android emulator. Steps are tailored to your selected game.
Open Multi-MEmu
Once installed, open Multi-MEmu — the multi-instance manager.
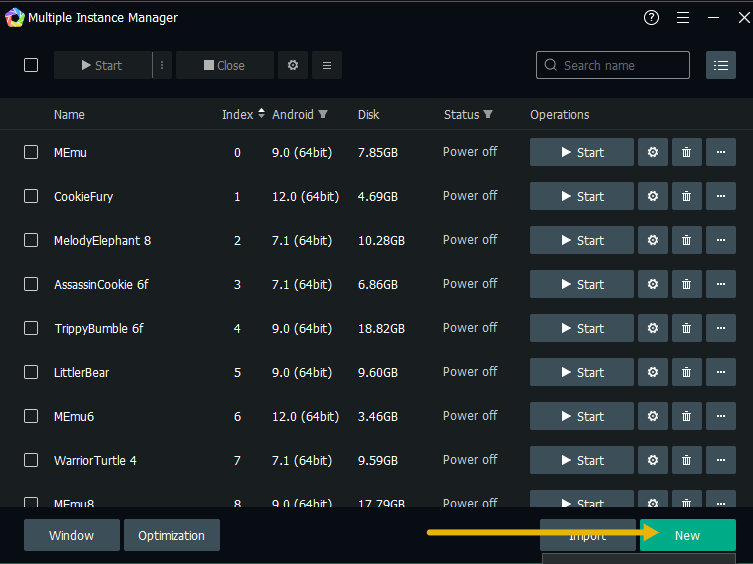
Click "New" then "Batched Create MEmu"
In the bottom-right corner, click New. A small dropdown will appear — select Batched Create MEmu. This lets you create all your farm instances at once with the correct settings.
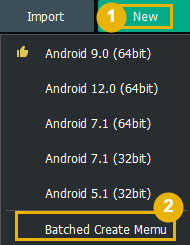
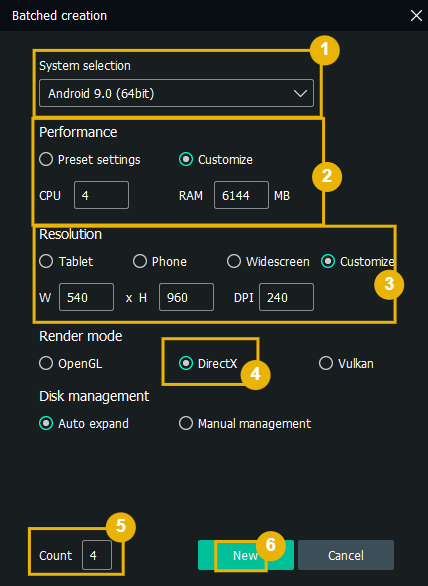
Configure the Batched Create settings
In the Batched Create dialog, apply the following settings for this game:
- Android version: Android 9
- Performance: 2–4 CPU cores 4–6 GB RAM (choose what your system can handle)
- Resolution: set to Customize — 540 × 960 × 240
- Render Mode: DirectX
- Count: set this to the number of farm accounts you want to run.
Once everything is set, click New to create all instances at once.
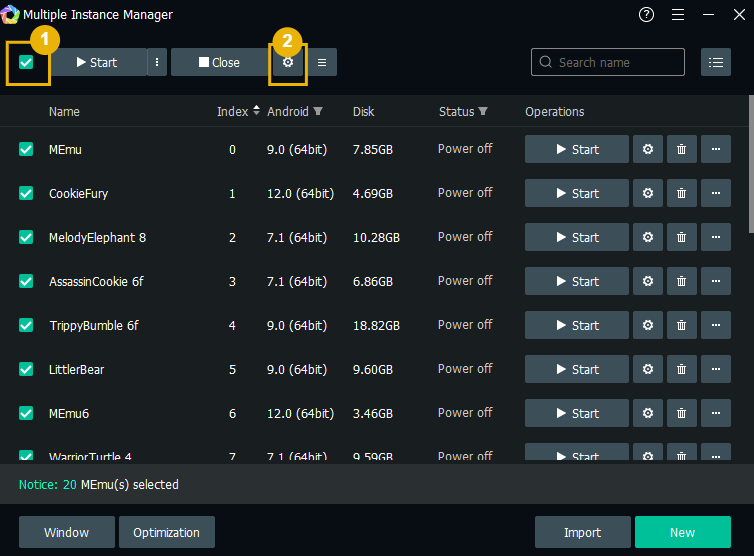
Open settings for all instances
Once your instances are created:
- Click the checkbox in the top-left corner to select all instances (as shown in the image).
- Click the Settings gear icon to open shared settings for all selected instances.
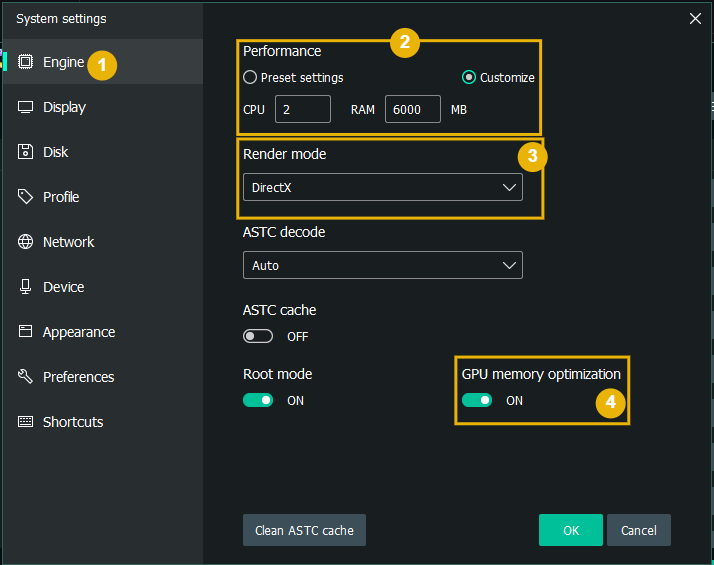
Engine tab settings
In the Settings window, click the Engine tab and apply:
- Performance: 2–4 CPU cores 4–6 GB RAM
- Render Mode: DirectX
- Enable GPU Memory Optimization
Display tab settings
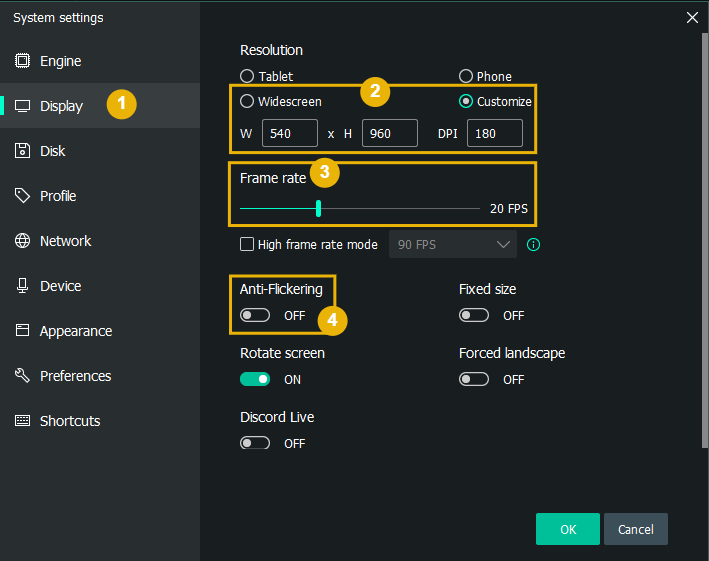
Click the Display tab and verify or set:
- Resolution: Width: 540 · Height: 960 · DPI: 240
- Frame Rate: 20 FPS — a lower frame rate uses fewer system resources; raise it if your PC can handle it.
- Anti-Flickering: OFF
Disk tab — set Cache Policy
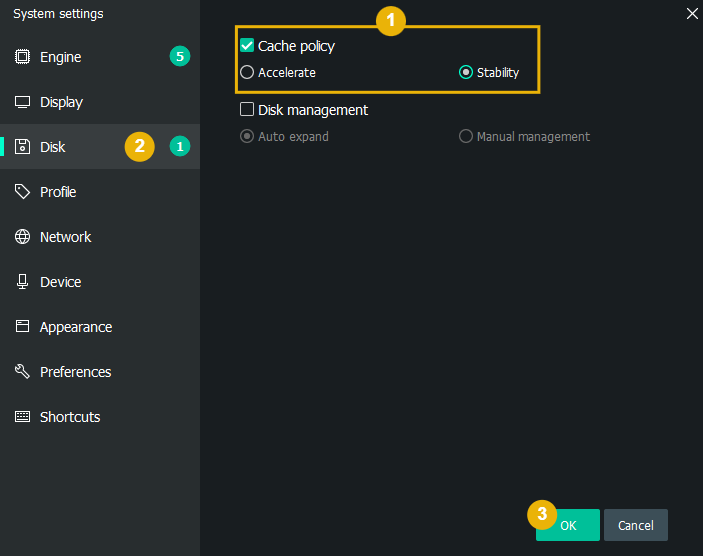
- Click the Disk tab.
- Set Cache Policy to Stable — this prevents MEmu data from being corrupted in the event of a sudden power loss or unexpected shutdown.
- Click OK to save all settings.
Understand Farm Settings and emulator mapping
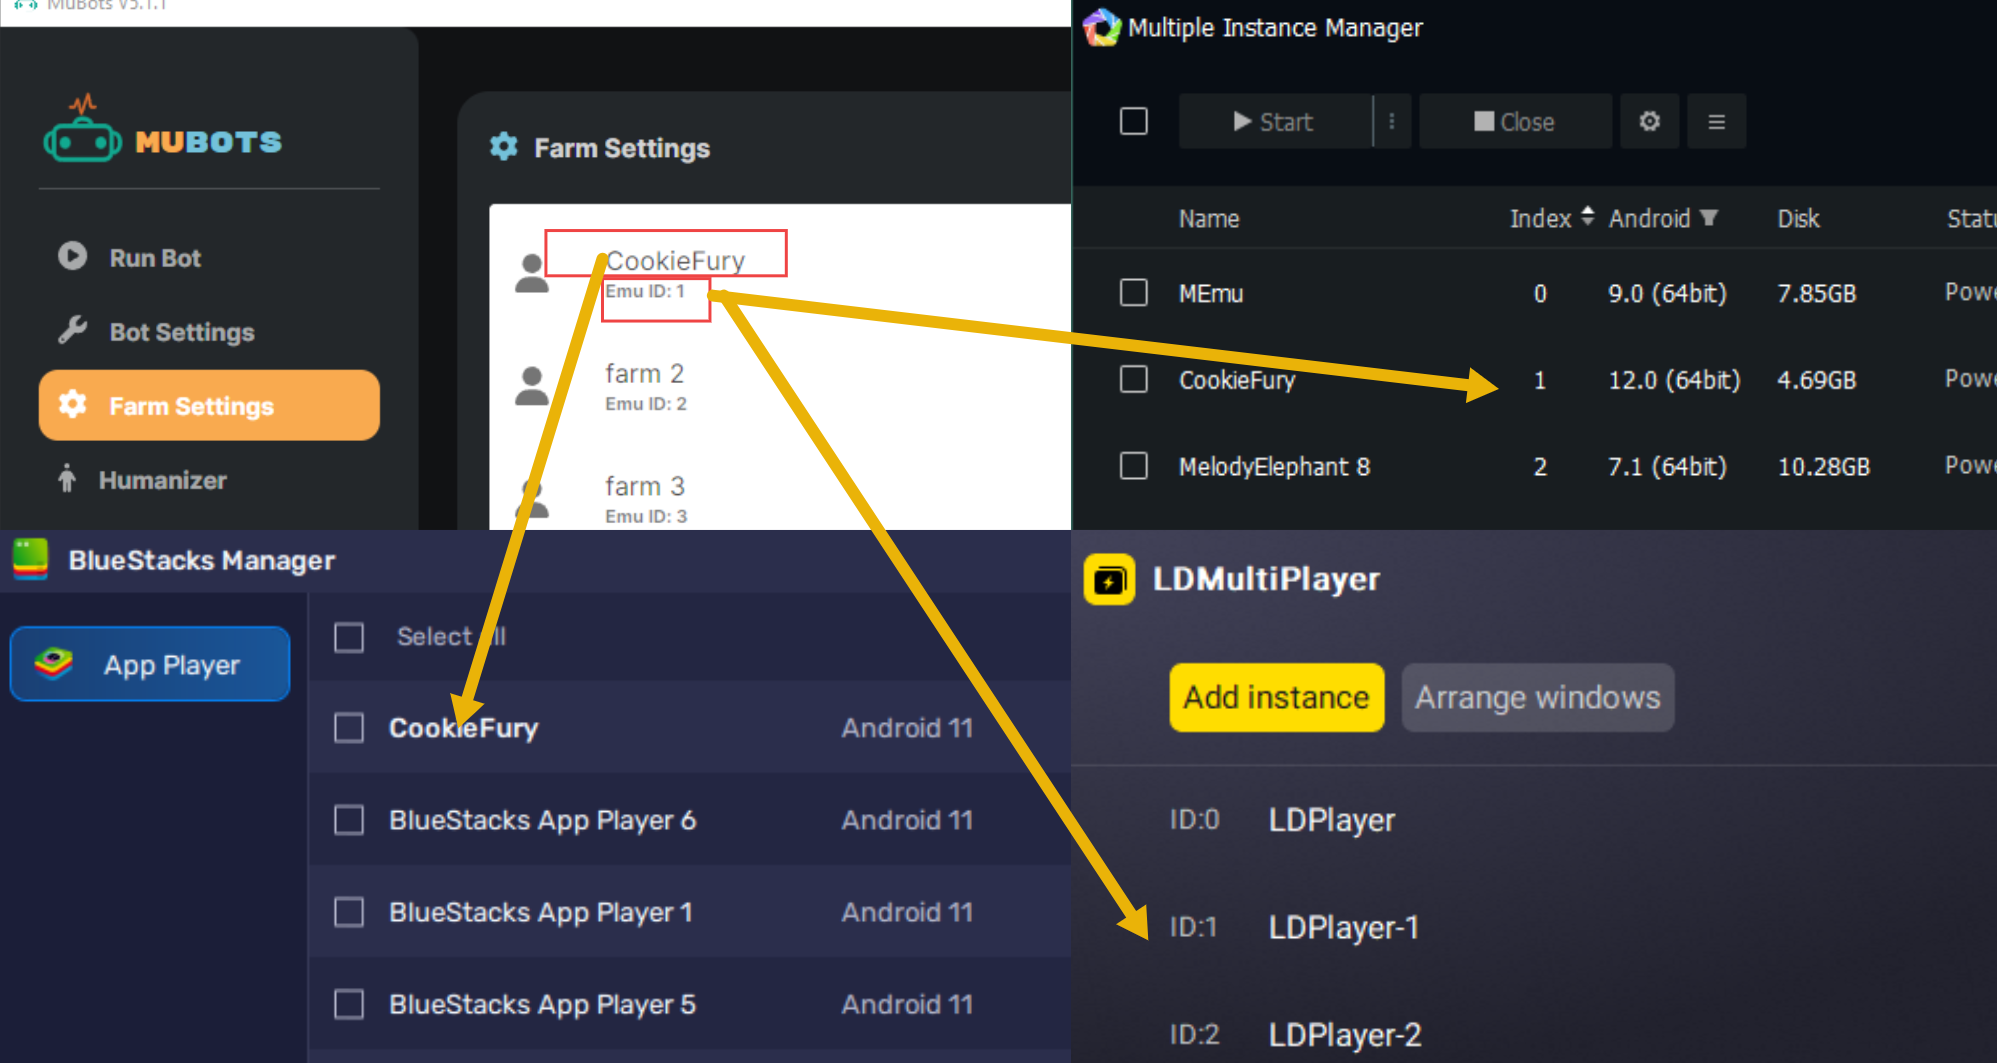
Open the bot and navigate to Farm Settings. You will see a list of farms — Farm 1 (Emu ID: 1), Farm 2 (Emu ID: 2), Farm 3 (Emu ID: 3), and so on. Each farm corresponds to one emulator instance. Here is how the mapping works:
- MEmu: Emu ID matches the Index column in Multi-MEmu (e.g. Farm 1 = Index 1, Farm 2 = Index 2).
- LDPlayer: Emu ID matches the ID column in LD MultiPlayer (e.g. Farm 1 = ID:1, Farm 2 = ID:2).
- BlueStacks: The farm name shown in the bot must match the instance name in BlueStacks Manager exactly (e.g. if the farm is named “CookieFury” in the bot, the BlueStacks instance must also be named “CookieFury”).
Install the game and log in to your farm account
Do this for each farm, starting with Farm 1:
- Open the corresponding emulator instance — Instance Index 1 in MEmu, ID:1 in LDPlayer, or the matching named instance in BlueStacks.
- Sign in to the Google Play Store inside the instance and download your game.
- Launch the game and switch to your farm account — this is the account that this instance will manage.
- Once logged in, close the emulator instance.
- Repeat for each additional farm (Farm 2 = Instance 2, and so on).
Configure farm settings in the bot
Back in the bot, go to Farm Settings. Click the settings gear icon next to Farm 1 (Emu ID: 1) to configure its farming preferences — resources to collect, troop training, attack schedules, and more. Repeat for each farm.
Start the bot
Once your farm settings are configured, go to the Run Bot tab in the bot and click Run Bot. The bot will begin automating your farms.